How to sell food from home in the Philippines
You already cook. Turning that into income takes a menu, a price, a place to sell, and a little paperwork. Here is the whole path, in order, without the fluff.
Updated July 8, 2026 · By the Suki Neighbors team
Step 1: Pick what to sell
The best first product sits where three things overlap: you cook it well without a recipe, it survives a short trip in a container, and the ingredients leave room for profit. Ulam with rice, lumpia, baked goods, leche flan, and meal prep packs all pass the test. A soup that must be eaten in 10 minutes does not.
Start with one or two items, not a full menu. You want to be known for something: "yung adobo ni Ate Len sa 12F" is a brand. Need ideas? Here are 25 that work in PH kitchens.
Step 2: Price it before you post it
Most new sellers guess a price by feel and quietly lose money on packaging and gas. The quick method: add up every ingredient in one batch, add packaging per serving, add a share of LPG and utilities, then divide by servings. That is your true cost. Charge 2.5 to 3 times that for cooked food.
A ₱120 adobo-with-rice that costs you ₱45 all-in is a healthy benta. The full computation, with real peso examples, is in the pricing guide.
Step 3: Sort the paperwork, sized to your stage
The legal side scales with how serious you are. Do not let stage-3 paperwork stop a stage-1 benta.
| Stage | What it looks like | What you usually need |
|---|---|---|
| Kusina benta | Selling to neighbors and friends, small batches, extra income | Barangay clearance is the usual starting point; keep receipts and start good food-handling habits |
| Registered home business | Regular customers, steady weekly income, a real menu | DTI business name, Mayor's/business permit, BIR registration, sanitary permit and health certificate |
| Scaling up | Packaged or repacked products, reselling through stores, shelf-stable goods | Everything above plus FDA License to Operate for processed/packaged food |
Freshly cooked meals sold direct to your neighbors are generally covered by LGU-level permits; FDA enters the picture when you process, package, and label products for wider retail. The permits guide walks through each requirement, where to get it, and roughly what it costs.
Step 4: Cook like someone is watching
One bad tummy ends a home food business faster than any competitor. The rules are simple and cheap: cook thoroughly, keep hot food hot and cold food cold, label what you packed and when, and never let cooked food sit out for hours. The food safety guide turns this into a checklist you can tape to the fridge.
Step 5: Choose where to sell
Home sellers in the Philippines really have three channels:
- FB and Viber buy-and-sell groups.Free and familiar, but your post is buried in an hour, orders arrive as scattered DMs, and "Meron pa po ba?" goes unanswered while you cook. The full comparison.
- Delivery apps. Real reach across the city, but built for restaurants: commissions take a serious cut of every order, and you compete with every burger chain in town. How they differ.
- Your own building or village. The people most likely to buy your food live minutes away. A community marketplace like Suki Neighbors gives you a real storefront there: live stock, an order queue, direct payments, zero commission.
These stack. Many sellers post on Suki, then share the listing link into the group chat - the chat brings eyeballs, the storefront takes the orders.
Step 6: Post your first benta
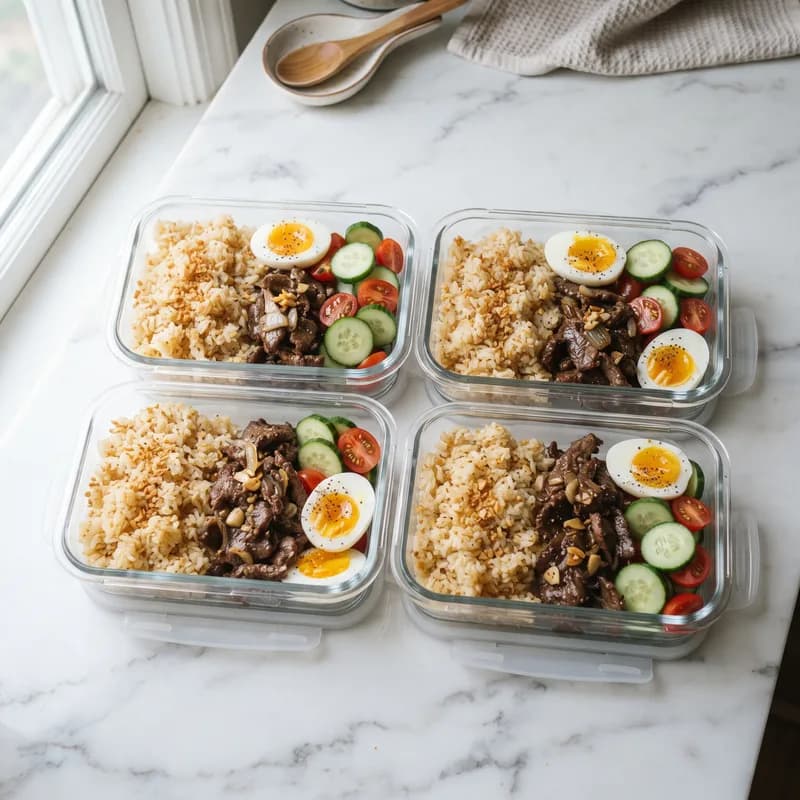
- Photograph in natural light, close-up, on a clean surface. Phone cameras are plenty.
- Name it with the portion: "Beef Tapa Meal Prep (4 packs)" answers the first question before it's asked.
- Post when people decide about food: 9-11 AM for lunch, 2-4 PM for merienda and dinner plans.
- Say how many you have. Scarcity is honest here - you really did cook only 15.
On Suki, posting takes about a minute and your listing stays live for 12 hours, so the feed only ever shows food that exists today. The seller guide covers every detail.
Step 7: Deliver and get paid
Selling to your own building deletes the hardest part of a food business: logistics. No rider, no delivery radius, no melted leche flan in traffic. You hand the order over a few floors away, or the buyer picks it up. Get paid the way you already do - GCash, Maya, bank transfer, or cash - direct to you.
Step 8: Turn buyers into suki
The first order is marketing; the tenth is a relationship. Consistency makes suki: same quality, predictable days, a message when you post something new. On Suki Neighbors, buyers can follow your store and get notified the moment you post - your regulars build themselves.
Common questions
Is it legal to sell food from home in the Philippines?
Yes. Home-based food businesses are common and legitimate. Small-scale sellers typically start with barangay clearance, then add DTI, Mayor's permit, BIR, and a sanitary permit as the business becomes regular. FDA licensing applies to processed and packaged products, not home-cooked meals sold directly.
How much capital do I need to start?
Many sellers start with ₱1,000 to ₱3,000: one batch of ingredients plus containers. Because you cook to order within your building, there is no inventory to sit on and no storefront to rent.
What home-cooked food sells best?
Everyday ulam with rice, merienda (lumpia, pandesal, kakanin), desserts like leche flan, meal prep packs for working neighbors, and party trays for weekends. Start with what you are already known for among friends.
Do I need FDA approval for baked goods?
Not for fresh-baked goods sold directly to buyers. FDA License to Operate applies when you manufacture, package, and label food for retail distribution - shelf-stable, repacked, or branded products.
How do I find my first customers?
Start with the people who already know your cooking: your building, your village, your barangay. Post where they already look for food, share your listing in the group chat, and let the first 10 orders become word of mouth.